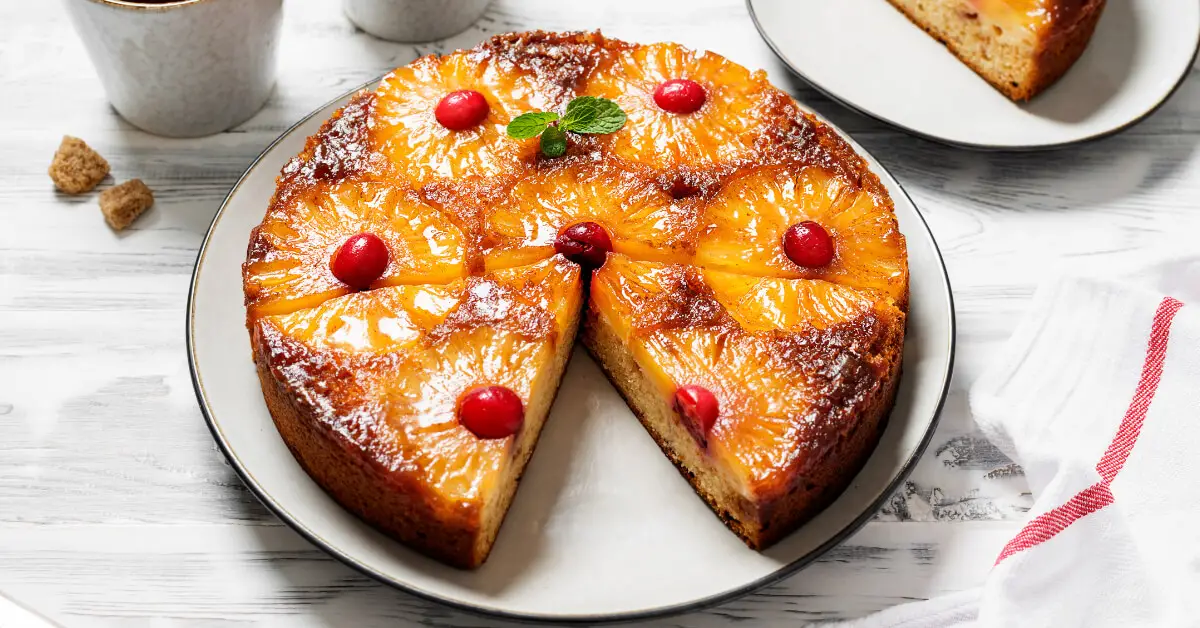
Why Pineapple Upside Down Cheesecake is a Showstopper Dessert
Pineapple Upside Down Cheesecake isn’t just another dessert; it’s a centerpiece that can elevate any occasion. The vibrant, caramelized pineapple topping creates a stunning visual contrast against the creamy, white cheesecake layer, making it as beautiful as it is delicious. It’s the perfect dessert to serve at gatherings, whether it’s a family dinner or a special celebration, because it always draws “oohs” and “aahs” from everyone at the table.
Ingredients List
Here’s what you’ll need to make this incredible dessert:
For the Pineapple Topping:
- 1/4 cup (50g) unsalted butter
- 2/3 cup (150g) packed brown sugar
- 1 can (20 oz) pineapple slices, drained
- Maraschino cherries (optional, for decoration)
For the Cheesecake Filling:
- 3 (8 oz) packages cream cheese, softened
- 1 cup (200g) granulated sugar
- 1 tsp vanilla extract
- 3 large eggs
- 1/4 cup (60ml) sour cream
- 1/4 cup (60ml) heavy cream
For the Crust:
- 1 1/2 cups (150g) graham cracker crumbs
- 1/4 cup (50g) granulated sugar
- 1/2 cup (115g) unsalted butter, melted
Timing
- Preparation time: 30 mins
- Cooking time: 1 hr 20 mins
- Cooling and Chilling: 3 hr 10 mins
- Total time: 5 hours
Step-by-Step Guide to Making Pineapple Upside Down Cheesecake
-
Prepare the Pineapple Topping:
- In a saucepan, melt the butter over medium heat. Add the brown sugar and stir until it dissolves, creating a caramel sauce.
- Pour this caramel sauce into the bottom of a 9-inch springform pan.
- Arrange the pineapple slices over the caramel, and place maraschino cherries in the center of each pineapple slice if desired.
-
Make the Crust:
- In a medium bowl, combine the graham cracker crumbs, sugar, and melted butter. Mix until well combined.
- Press the mixture into the bottom of the springform pan, covering the pineapple topping evenly. Set aside.
-
Prepare the Cheesecake Filling:
- In a large bowl, beat the softened cream cheese until smooth and creamy. Gradually add the sugar, continuing to beat until fully incorporated.
- Mix in the vanilla extract. Add the eggs one at a time, beating well after each addition.
- Finally, blend in the sour cream and heavy cream until the mixture is smooth and lump-free.
-
Assemble and Bake:
- Pour the cheesecake filling over the prepared crust and smooth the top with a spatula.
- Bake in a preheated oven at 325°F (163°C) for about 1 hour 20 minutes, or until the center is set and the top is lightly golden.
-
Cool and Chill:
- Allow the cheesecake to cool in the oven with the door slightly ajar for 1 hour. This helps prevent cracks.
- Refrigerate the cheesecake for at least 4 hours, or overnight, before serving.

Tips for Creating the Perfect Caramelized Pineapple Topping
1- Make sure your caramel sauce is smooth and well combined before pouring it into the pan. This will ensure even caramelization.
2- Drain the pineapple slices thoroughly to prevent excess moisture, which can make the topping soggy.
How to Achieve a Smooth and Creamy Cheesecake Filling
1- Use room temperature ingredients to avoid lumps in your cheesecake batter.
2- Beating the cream cheese until smooth before adding other ingredients is crucial for a creamy texture.
3- Don’t overmix the batter once the eggs are added, as this can incorporate too much air and cause cracks.
Baking and Cooling Your Pineapple Upside Down Cheesecake
1- Bake the cheesecake in a water bath to maintain even heat and prevent the top from cracking.
2- Letting the cheesecake cool slowly in the oven helps avoid sudden temperature changes that can cause cracks.
Variations: How to Customize Your Pineapple Upside Down Cheesecake
1- Add a splash of rum or coconut extract to the cheesecake filling for a tropical twist.
2- Substitute the graham cracker crust with a shortbread or vanilla wafer crust for a different texture and flavor.
Serving Suggestions for Pineapple Upside Down Cheesecake
1- Serve chilled for the best texture and flavor.
2- A dollop of whipped cream or a scoop of vanilla ice cream on the side can take this dessert to the next level.
How to Store and Freeze Pineapple Upside Down Cheesecake
1- Storing: Keep the cheesecake in the refrigerator for up to 5 days. Cover it with plastic wrap or store it in an airtight container to prevent it from drying out.
2- Freezing: You can freeze the cheesecake for up to 3 months. Wrap it tightly in plastic wrap and aluminum foil before freezing. Thaw overnight in the refrigerator before serving.
Common Mistakes to Avoid When Making Pineapple Upside Down Cheesecake
1- Overbaking: Overbaking can cause the cheesecake to become dry and crumbly. Keep an eye on it and remove it from the oven when the center is just set.
2- Skipping the water bath: A water bath helps the cheesecake bake evenly and prevents cracks. It’s worth the extra step.
3- Not allowing enough cooling time: Cheesecake needs time to set and develop its flavor, so don’t rush the cooling and chilling process.
Nutritional Information
Per Serving (based on 12 servings):
-
- Calories: 450
- Fat: 30g
- Carbohydrates: 40g
- Protein: 6g
- Sugar: 32g
Conclusion
Pineapple Upside Down Cheesecake is a dessert that’s sure to impress with its stunning appearance and irresistible flavor. Whether you’re making it for a special occasion or just because, this recipe is a must-try. With the tips and step-by-step guide provided, you’ll be able to create a cheesecake that’s smooth, creamy, and perfectly caramelized. So go ahead and give it a try—you’ll be glad you did.

