
The California Crunch Roll Sushi Recipe, a beloved variant of the classic California Roll, offers a delightful combination of creamy avocado, sweet crabmeat, and crispy textures. Making this sushi favorite at home can be an enjoyable and rewarding experience. This ultimate guide is designed to walk you through each step of the process, from preparing the perfect sushi rice to mastering the art of sushi rolling, ensuring that you can create delicious and visually appealing sushi rolls right in your own kitchen.
Preparing Your Sushi Rice to Perfection
Ingredients for the Perfect Sushi Rice
When it comes to sushi, the rice is just as important as the fish. It’s the foundation that holds everything together, and getting it right is crucial for that authentic sushi experience. The best rice for sushi is a high-quality Japanese short-grain rice; it has the perfect balance of stickiness and texture. Here’s what you’ll need:
2 cups of sushi rice
2 cups of water
2 tablespoons of rice vinegar
1 tablespoon of sugar
1/2 teaspoon of salt
Start by rinsing the rice under cold water until the water runs clear. This step is essential to remove any excess starch, which can affect the texture of your sushi rice. After rinsing, cook the rice with the measured water. Whether you’re using a rice cooker or a traditional pot, the goal is to achieve rice that’s tender yet firm to the bite.
Once your rice is cooked, the seasoning is what will give it that distinctive sushi flavor. While the rice is still warm, gently fold in a mixture of rice vinegar, sugar, and salt. This not only seasons the rice but also gives it a glossy sheen that’s characteristic of sushi rice. Take care to fold rather than stir to avoid crushing the grains.
If you want to enhance the flavor further, consider adding a piece of kombu (dried kelp) to your cooking water. It’s optional but can add a subtle umami depth to your sushi rice.
Cooking the Rice Just Right
After meticulously washing the rice, it’s time to cook it to that perfect sticky consistency we all love in sushi. I start by soaking the well-drained rice with 2 cups of water and a piece of kombu in my rice cooker. This little rest of 20-30 minutes before cooking is my secret to getting each grain to plump up just right.
Cooking is a delicate balance; I bring the water to a boil, then reduce the heat to a simmer, ensuring the rice absorbs the water evenly. Once the water is absorbed, I let it sit for about 5 minutes before fluffing it with a fork. This step is crucial for achieving that signature sushi rice texture.
The key is to be patient and let the rice steam after cooking. It’s tempting to peek, but that steam is what finishes the cooking process.
Finally, I spread the rice out on a flat surface to cool. It’s important not to rush this step. Cooling the rice properly prevents it from becoming mushy when it’s time to mix in the sushi vinegar.
Seasoning with Homemade Sushi Vinegar
Once my sushi rice is cooked to that ideal sticky and fluffy consistency, it’s time to add the magic touch with homemade sushi vinegar. I start by combining rice vinegar, sugar, and a touch of kosher salt in a saucepan, heating it just enough to dissolve the sugar. This simple mixture will elevate the rice with a glossy finish and a tangy-sweet flavor.
Combine 1/3 cup of rice vinegar with 3 tablespoons of sugar and 1 1/2 teaspoons of kosher salt.
Heat the mixture until the sugar dissolves, either on the stove or in the microwave.
Let the mixture cool before using it to season the rice.
After the vinegar mix is cooled, I pour it over the hot rice and gently fold it in. It’s crucial to be gentle here; I use a slicing motion with a rice paddle to avoid mashing the grains. A good fan while mixing helps to cool the rice down quickly and gives it that perfect sushi rice texture we’re aiming for.
The seasoned rice should be glossy and have a slightly tangy taste to complement the flavors of the sushi.
Assembling Your California Crunch Roll
Gathering the Essential Ingredients
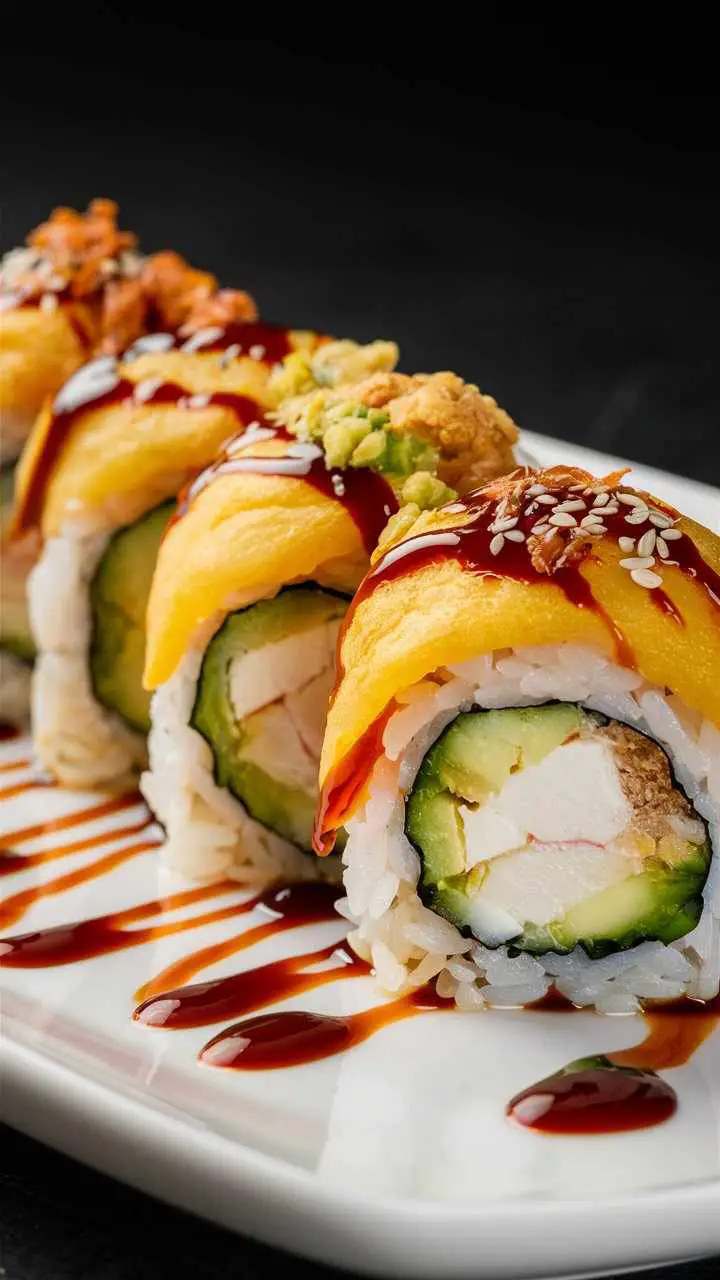
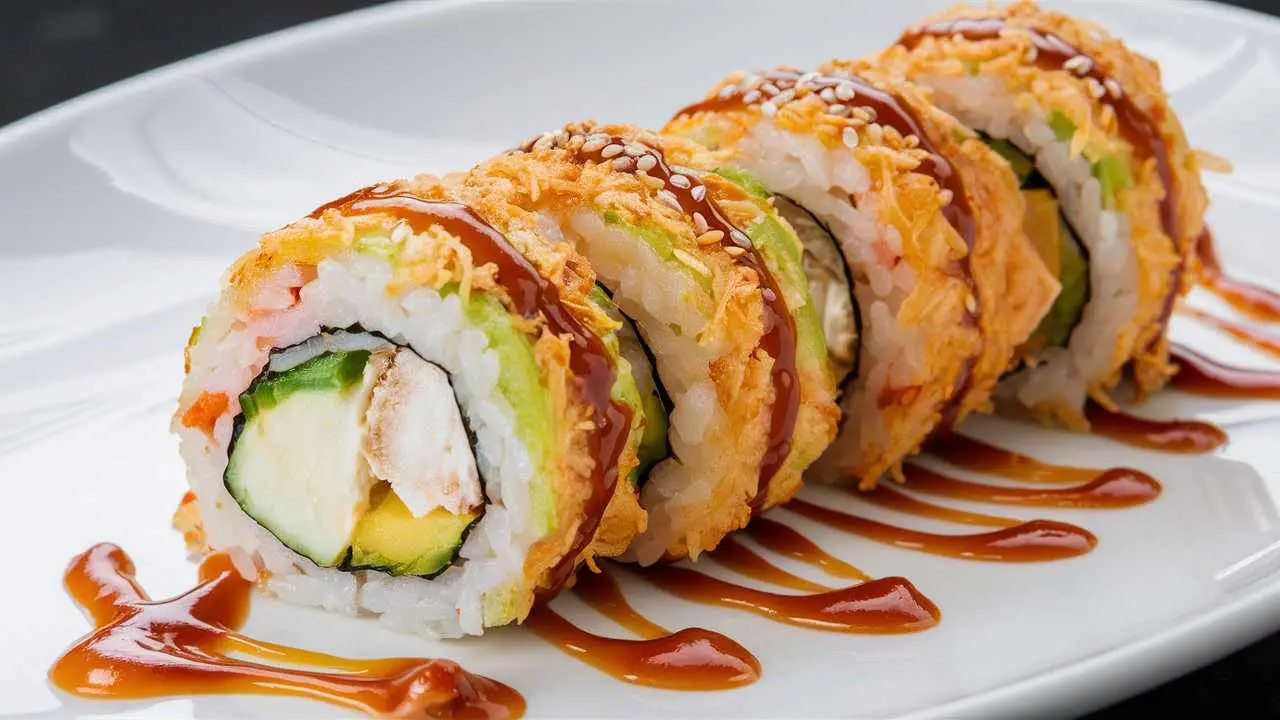
Before we dive into the art of sushi-making, let’s make sure we have all the essential ingredients on hand. The heart of our California Crunch Roll lies in its fillings: succulent crab (often imitation for affordability), crisp cucumber, creamy avocado, and the irresistible crunch of tempura batter flakes. And let’s not forget, the roll is also tantalizingly coated with these golden flakes for that extra texture.
Crab (imitation or real)
Cucumber
Avocado
Tempura batter flakes
The key to a successful sushi roll is not just in the rolling technique, but in the freshness and quality of the ingredients you choose. Take the time to select the best produce and prepare them with care. This will ensure that every bite of your California Crunch Roll is bursting with flavor and texture.
Layering for the Ultimate Crunch
The secret to that irresistible crunch in a California roll lies in the layering. Start by spreading a thin layer of sushi rice on your nori sheet, leaving about an inch at the top for sealing the roll later. Then, sprinkle a generous amount of golden panko breadcrumbs or tempura flakes over the rice. These are the game-changers that wrap around the soft, vinegared rice and creamy fillings, providing that delightful contrast in textures with every bite.
Next, lay your crisp, fresh vegetables like cucumber and avocado along with the crab meat or imitation crab in a line down the center of the rice. Remember, the crunch isn’t just about the panko or tempura; it’s also about the freshness and snap of the vegetables. Optionally, you can add a dash of toasted sesame seeds for an extra layer of subtle crunch and nutty flavor.
The beauty of a California Crunch Roll is in the harmony of textures. The soft embrace of the rice against the sharp snap of fresh vegetables, crowned by the golden crunch of panko or tempura, creates a symphony in your mouth.
Finally, before you start rolling, make sure everything is evenly distributed to ensure a consistent crunch throughout the roll. It’s these little details that make your homemade sushi rival that of a professional sushi chef.
Rolling Your Sushi Like a Pro
After meticulously preparing your ingredients, it’s time to roll up your sleeves and get down to the fun part. Rolling sushi is an art, and with a little practice, you’ll be making California Crunch Rolls like a seasoned sushi chef. Here’s a step-by-step guide to help you master the technique:
Lay out your bamboo mat and place a sheet of nori on top.
Evenly spread your prepared sushi rice over the nori, leaving a small margin at the top.
Arrange your fillings – crab, avocado, and cucumber – in a line across the rice.
Start at the bottom edge of the nori, gently lifting the bamboo mat with your thumbs while holding the fillings in place with your other fingers.
Roll the mat over the filling, tucking the leading edge of the nori to encase the fillings.
Firmly squeeze the sushi roll through the mat to shape it into a tight cylinder.
Lift the bottom edge of the bamboo mat slightly and roll the sushi forward, maintaining gentle pressure.
To finish, press the top with your index fingers while squeezing the sides to perfect the roll’s shape.
Once you’ve mastered this basic rolling technique, you’ll be able to tackle any sushi recipe with confidence. The How to Make California Crunch Roll Sushi Recipe at Home: Step-by-step guide ensures that you can recreate that rock n roll vibe in your own kitchen, focusing on a creative and edgy presentation that’s sure to impress.
Remember, the key to a perfect sushi roll is even pressure and confidence in your rolling. With each roll you make, you’ll find your rhythm and technique improving. So, don’t be afraid to experiment and have fun with it!
Mastering the Art of Sushi Rolling
Setting Up Your Sushi Station
Before we dive into the art of rolling sushi, it’s crucial to have an organized sushi station. Start by designating specific areas for each task to streamline your sushi-making process. Here’s how I like to set up my station:
A clean, spacious countertop for assembling the rolls.
Kitchen drawers and cabinets for storing dry ingredients like rice and seaweed.
A designated spot for my bamboo mat and rice paddles, which are essential for rolling.
A cutting board and a sharp knife placed within easy reach for slicing ingredients and the final roll.
Having everything in its place not only makes the process smoother but also adds to the enjoyment of making sushi at home.
Remember to keep your workspace tidy as you go. A clutter-free station means fewer distractions and more room for creativity. Let’s roll up our sleeves and get ready to make some delicious sushi!
Step-by-Step Guide to Rolling
Once you’ve got all your ingredients laid out, it’s time to roll up your sleeves and get to the fun part. Start by placing the bamboo mat on a flat surface and lay a sheet of nori on top, shiny side down. Spread your prepared sushi rice evenly over the nori, leaving about an inch of space at the top edge.
Place your fillings in a line across the center of the rice.
Lift the edge of the mat closest to you, using your thumbs, while the rest of your fingers keep the fillings in place.
Roll the mat over the fillings, ensuring the rice meets the nori on the other side.
Once you’ve completed the roll, it’s crucial to shape it. > Gently squeeze the roll through the mat to firm it up without squashing the contents. If you’re feeling unsure, just take it slow and focus on maintaining even pressure. After shaping, unwrap the mat and voila, you’ve got a sushi roll! Now, simply slice it into bite-sized pieces and you’re ready to impress with your homemade California Crunch Roll.
Cutting Your Rolls for the Perfect Presentation
After you’ve mastered the roll, it’s time to focus on presentation. A sharp knife is your best friend here, ensuring that each slice is clean and precise. Here’s how I do it:
Lay the roll seam-side down on a cutting board.
With a steady hand, slice the roll into bite-size pieces. I find that cleaning the knife between cuts helps to maintain that perfect edge.
If the roll loses its shape, don’t worry! Just wrap it in the bamboo mat and give it a gentle squeeze to re-form it.
The moment of slicing is when your sushi truly takes shape. It’s not just about taste; it’s about creating an experience for the eyes as well.
Finally, arrange your sushi artfully on a plate. Add a touch of wasabi, a drizzle of soy sauce, or a sprinkle of sesame seeds to elevate the presentation. Each piece should be a testament to your skill and attention to detail.
Creative Twists on the Classic California Roll
Exploring Different Filling Variations
I’ve always found that the beauty of making sushi at home is the freedom to experiment with fillings. Beyond the classic combination of poached shrimp, cucumber, and avocado, there’s a world of flavors waiting to be rolled into your California Crunch Roll. Here are a few ideas to get you started:
Mix goat cheese with herbs like chives and thyme for a creamy, tangy twist.
Incorporate a sharp cheddar, like Cabot Seriously Sharp Cheddar, to add depth to your roll.
For a bit of heat, consider a filling with a kick of gochugaru or red pepper flakes.
Embrace the creative process and don’t be afraid to mix and match ingredients that speak to your palate. The goal is to enjoy every bite with a personal touch.
Remember, the key to a successful variation is balance. You want to ensure that no single ingredient overpowers the others, but rather, they all come together to create a harmonious bite. It’s all about finding that perfect mix that makes your taste buds dance.
Decorating with Toppings for Extra Flair
When I make my California Crunch Rolls, I love to add a personal touch with some creative toppings. It’s not just about the taste; it’s about making a visual impact that complements the flavors. A sprinkle of sesame seeds or a drizzle of spicy mayo can elevate your sushi to the next level.
Here’s how I like to decorate my rolls:
A few slices of avocado fanned out on top add a creamy texture.
Thinly sliced green onions give a pop of color and a sharp, fresh taste.
Masago or tobiko can be sprinkled on for a burst of color and a delightful crunch.
The beauty of sushi is in its simplicity and the subtle art of presentation. With just a few extra touches, your California Rolls can transform from homemade to restaurant-quality.
Experimenting with different toppings is part of the fun. Sometimes, I’ll even add a few edible flowers for a truly show-stopping effect. The key is to use ingredients that not only look good but also complement the flavors inside the roll.
Pairing with Sauces and Condiments
When I’ve finished crafting my California Crunch Roll, the right sauces and condiments can elevate it from delicious to divine. I always start with soy sauce, a classic that brings a salty umami kick. I offer both regular and low-sodium options because everyone’s taste is different.
Next, I like to add a bit of heat with some spicy mayo. It’s creamy, with just enough kick to add an exciting contrast. And for a sweet and tangy note, I can’t go without a drizzle of teriyaki sauce. It’s perfect for those who prefer a milder spice level.
For a truly authentic experience, I make sure to include pickled ginger and wasabi on the side. The ginger is tangy and refreshing, perfect for cleansing the palate between bites. The wasabi, with its sharp pungency, should be used sparingly to complement, not overwhelm, the sushi’s flavors.
Lastly, I consider the beverage pairings. A light beer or a crisp white wine can be the perfect accompaniment to the rich flavors of the sushi. And of course, a cup of warm green tea is always a comforting way to round off the meal.
Tips and Tricks for California Crunch Roll Sushi Recipe Success
Keeping Ingredients Fresh and Flavorful
Ensuring that the ingredients for your sushi are fresh and full of flavor is crucial to the success of your homemade California Crunch Roll. Always start with the freshest fish you can find, preferably sashimi-grade, and keep it refrigerated until it’s time to use. Vegetables should be crisp and vibrant, so choose the best quality you can get your hands on.
When it comes to rice, it’s best to use it shortly after it’s cooked to maintain the perfect texture and warmth. If you’re using leftovers, make sure to store them properly. Leftover sushi that includes raw ingredients should be refrigerated promptly and consumed within 1-2 days. For cooked sushi varieties, you have a bit more leeway.
To keep your sushi tasting its best, avoid leaving it at room temperature for extended periods. This not only helps in preserving the flavor but also ensures food safety.
Here’s a quick checklist to keep your ingredients in top condition:
Store raw fish and seafood in the coldest part of your fridge.
Wrap vegetables in damp paper towels before refrigerating to maintain their crispness.
Use rice that has been cooled down but is still slightly warm to the touch for the best texture.
Sushi Etiquette and Serving Suggestions
When I’m ready to serve my California Crunch Rolls, I always keep in mind that presentation is nearly as important as taste. Sushi etiquette is an art in itself, and it starts with how you plate your creations. Here are a few tips I’ve picked up along the way:
Arrange the sushi pieces in odd numbers on the plate; it’s visually more appealing and considered good luck in Japanese culture.
Give each piece enough space to stand out, yet close enough to maintain a sense of unity on the plate.
Use garnishes like a drizzle of spicy mayo or a sprinkle of sesame seeds sparingly to enhance, not overpower, the delicate flavors of the sushi.
When it comes to serving, I like to include a variety of dipping sauces and ensure there’s a small mound of pickled ginger and a dollop of wasabi on the side. This not only adds to the flavor but also adheres to traditional sushi customs.
Pairing your sushi with the right beverage can elevate the entire experience. A light, crisp beer or a cup of subtly sweet green tea can complement the flavors beautifully. And remember, when enjoying sushi, it’s not just about the food—it’s about the moment. So take your time, savor each bite, and enjoy the company you’re with.
Troubleshooting Common Sushi-Making Challenges
We’ve all been there — you’re in the middle of making sushi and something just isn’t going right. Maybe your rolls aren’t as tight as you’d like, or the rice is sticking to your hands more than to itself. Don’t worry, I’ve got you covered with some quick fixes to common sushi-making hiccups:
Ensure your bamboo mat is wrapped in plastic wrap to prevent sticking and achieve a cleaner roll.
If your rice is too sticky, try wetting your hands with water and a bit of rice vinegar before handling it.
For those struggling with loose rolls, practice applying even pressure as you roll, and remember to tuck in the ingredients with each turn of the bamboo mat.
Sometimes, the issue might be with the nori itself. Starting with high-quality nori seaweed and storing it properly can make a world of difference. Prepare it just before use to maintain its crispness, and keep the fillings dry to avoid making the nori moist and soft.
If you’re finding that your sushi isn’t quite restaurant-quality yet, don’t get discouraged. It takes time and patience to perfect the art of sushi rolling. Keep practicing, and you’ll be making flawless California Crunch Rolls in no time!
Conclusion
As we wrap up our ultimate guide to making California Crunch Roll sushi at home, we hope you feel inspired and confident to roll up your sleeves and dive into the art of sushi making. Remember, while the process may seem daunting at first, with a little patience and practice, you’ll be crafting rolls that are as delicious as they are beautiful.
Don’t be discouraged if your first few attempts aren’t perfect; even seasoned sushi chefs started somewhere. Embrace the journey, experiment with different fillings, and most importantly, have fun with it. Sushi making is not just about the end result, but also the joy of creating something by hand that can be shared and savored with friends and family. So, gather your ingredients, follow our step-by-step guide, and get ready to impress at your next dinner party with your homemade California Crunch Rolls!
Frequently Asked Questions
What is a California Roll?
A California Roll is a type of sushi roll that is typically made with sushi rice, nori (seaweed), avocado, cucumber, and imitation crab meat. It’s known for being an inside-out roll, meaning the rice is on the outside.
What are the essential ingredients for a California Crunch Roll?
The essential ingredients for a California Crunch Roll include sushi rice, nori sheets, avocado, cucumber, imitation crab meat, and tempura flakes for the crunch.
How do you make homemade sushi vinegar?
To make homemade sushi vinegar, mix ⅓ cup of rice vinegar with 3 tablespoons of sugar and 1½ teaspoons of kosher salt. Heat the mixture until the sugar and salt dissolve, then cool before using.
What are some variations of the California Roll?
Variations of the California Roll can include different fillings like fish roe, spicy mayo, or different types of fish. Toppings like sesame seeds or tobiko can also be added for extra flavor and texture.
What is the proper way to cut sushi rolls?
To cut sushi rolls, use a very sharp knife to slice each roll in half crosswise, then cut each half into 4 pieces. Clean the knife with a damp cloth after every few cuts to maintain a clean edge.
How can I make my California Rolls look more professional?
To make your California Rolls look more professional, ensure the sushi rice is evenly spread, fillings are neatly placed, and rolls are tightly packed. Use a bamboo mat to shape the rolls and add decorative toppings like fish roe or sesame seeds.