

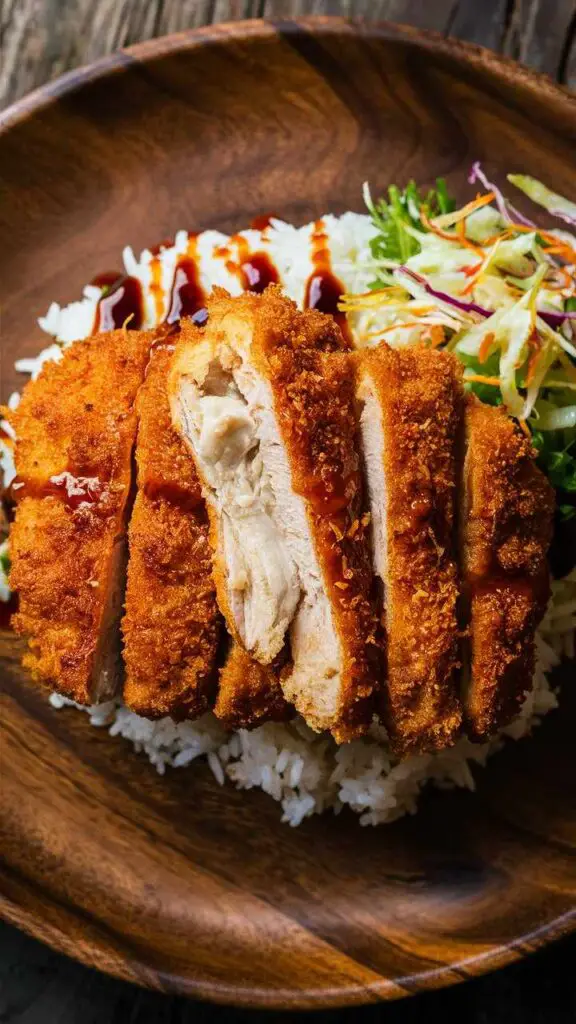
If you’ve ever visited the islands of Hawaii, chances are you’ve indulged in the crispy, golden deliciousness of chicken katsu. This beloved dish, a fusion of Japanese and Hawaiian culinary traditions, has become an iconic part of the local cuisine. With its panko-crusted exterior and tender, juicy interior, chicken katsu is a true crowd-pleaser, often served alongside steaming rice and tangy katsu sauce.
As a professional cook, I’ve spent countless hours perfecting the art of making authentic Hawaiian chicken katsu at home. In this comprehensive guide, I’ll share my expertise, tips, and tricks, ensuring that you can recreate this island favorite in your own kitchen.
Ingredients (4 Servings)
- 4 boneless, skinless chicken thighs
- 1 cup all-purpose flour
- 2 large eggs, beaten
- 2 cups panko breadcrumbs
- 1 teaspoon garlic powder
- 1 teaspoon salt
- 1/2 teaspoon black pepper
- Vegetable oil for frying
For the Katsu Sauce:
- 1/2 cup ketchup
- 2 tablespoons soy sauce
- 1 tablespoon rice vinegar
- 1 tablespoon brown sugar
- 1 teaspoon Worcestershire sauce
- 1/2 teaspoon ginger powder
- 1 garlic clove, minced
Timing
- Preparation Time: 20 minutes
- Cooking Time: 15-20 minutes
- Total Time: 35-40 minutes
Step-by-Step Preparation of Hawaiian Chicken Katsu
Step 1- Begin by pounding the chicken thighs to an even thickness, about 1/4 inch thick. This will ensure even cooking and a consistent crunch throughout.
Step 2- In a shallow dish, combine the flour, garlic powder, salt, and black pepper. Mix well.
Step 3- In a separate shallow dish, beat the eggs until well combined.
Step 4- Pour the panko breadcrumbs into a third shallow dish.
Step 5-nDredge the pounded chicken thighs in the flour mixture, coating both sides evenly. Shake off any excess flour.
Step 6-Next, dip the floured chicken into the beaten eggs, allowing the excess to drip off.
Step 7- Finally, coat the egg-dipped chicken in the panko breadcrumbs, pressing gently to ensure an even coating.
Step 8- Place the breaded chicken on a wire rack or plate and refrigerate for at least 15 minutes. This step helps the coating adhere better during frying.
How to Bread and Fry Hawaiian Chicken Katsu
Fill a heavy-bottomed skillet or Dutch oven with about 1 inch of vegetable oil. Heat the oil to 350°F (175°C) over medium-high heat.
Carefully add the breaded chicken pieces to the hot oil, being careful not to overcrowd the pan. Fry for 3-4 minutes per side, or until the coating is golden brown and crispy.
Use a slotted spoon or tongs to transfer the fried chicken katsu to a paper towel-lined plate to drain excess oil.
Repeat the frying process with the remaining chicken pieces, allowing the oil to return to the proper temperature between batches.
Making the Perfect Katsu Sauce for Hawaiian Chicken Katsu
While the chicken katsu is the star of the show, no Hawaiian plate lunch would be complete without the iconic katsu sauce. This tangy, slightly sweet sauce perfectly complements the crispy chicken and adds an extra burst of flavor.
In a small saucepan, combine the ketchup, soy sauce, rice vinegar, brown sugar, Worcestershire sauce, ginger powder, and minced garlic.
Whisk the ingredients together until well combined.
Bring the mixture to a gentle simmer over medium heat, stirring occasionally.
Once the sauce begins to bubble, reduce the heat to low and let it simmer for 2-3 minutes to allow the flavors to meld.
Remove the sauce from heat and let it cool slightly before serving alongside your freshly fried chicken katsu.
Side Dishes to Serve with Hawaiian Chicken Katsu
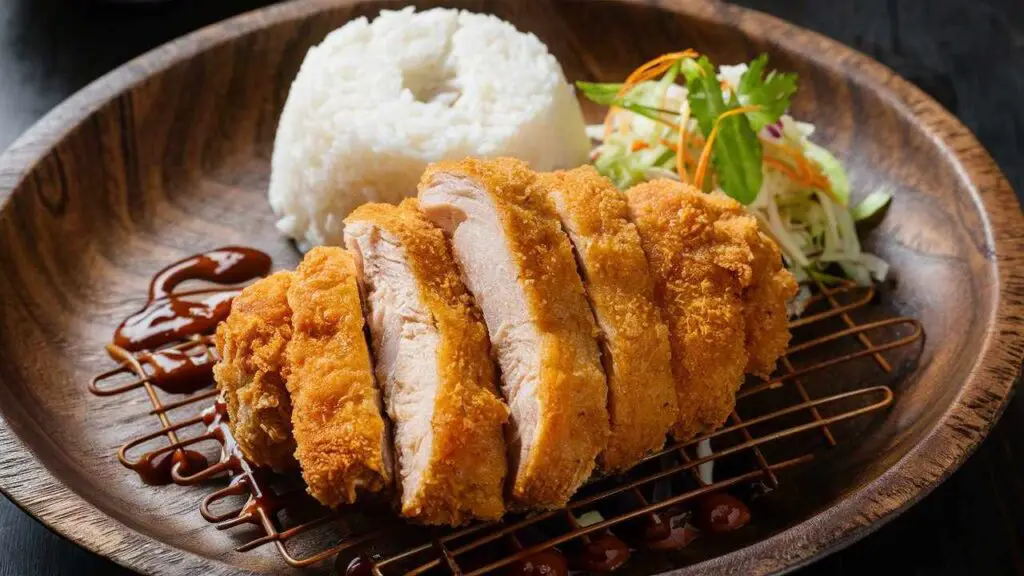
To truly capture the essence of a Hawaiian plate lunch, it’s essential to serve your chicken katsu with the traditional accompaniments. Here are a few side dish recommendations:
1- Steamed white rice: A bed of fluffy, steamed rice is the perfect base for your crispy chicken katsu and katsu sauce.
2- Hawaiian macaroni salad: This creamy, tangy salad is a staple on Hawaiian plate lunches and complements the flavors of the chicken katsu beautifully.
3- Pickled vegetables: A refreshing side of pickled cucumbers, carrots, or daikon radish adds a bright, acidic contrast to the rich flavors of the dish.
4- Steamed vegetables: Simple steamed vegetables, such as broccoli or cabbage, provide a healthy and colorful addition to your plate.
Tips for Achieving the Perfect Crunch in Hawaiian Chicken Katsu
One of the hallmarks of a great chicken katsu is its crispy, crunchy exterior. Here are some tips to help you achieve that coveted crunch:
1- Use panko breadcrumbs: Panko breadcrumbs are larger and more coarse than regular breadcrumbs, which helps create a crispier coating.
2- Refrigerate before frying: Allowing the breaded chicken to rest in the refrigerator for at least 15 minutes before frying helps the coating adhere better and ensures maximum crunchiness.
3- Maintain the proper oil temperature: Frying at the correct temperature (350°F/175°C) is crucial for achieving a golden, crispy exterior without burning or undercooking the chicken.
4- Avoid overcrowding the pan: Overcrowding the pan can cause the oil temperature to drop, resulting in soggy, greasy katsu. Fry in batches if necessary.
Healthier Variations of Hawaiian Chicken Katsu
While chicken katsu is undoubtedly delicious, it can be a bit indulgent. If you’re looking for a lighter alternative, consider these healthier variations:
1- Baked chicken katsu: Instead of frying, bake the breaded chicken pieces in a preheated oven at 400°F (200°C) until golden brown and crispy.
2- Air-fried chicken katsu: Use an air fryer to achieve a crispy exterior with significantly less oil.
3- Whole wheat panko: Substitute regular panko with whole wheat panko breadcrumbs for added fiber and nutrition.
4- Chicken breast: While chicken thighs are traditional, you can use boneless, skinless chicken breasts for a leaner option.
Common Mistakes to Avoid When Making Hawaiian Chicken Katsu
Even with the best intentions, it’s easy to make a few missteps when preparing chicken katsu. Here are some common mistakes to avoid:
1- Using stale panko breadcrumbs: Stale or expired panko breadcrumbs can result in a tough, unappetizing coating.
2- Overcrowding the pan: As mentioned earlier, overcrowding the pan can lead to soggy, greasy katsu.
3- Undercooking the chicken: Ensure that the chicken is cooked through by using a meat thermometer. The internal temperature should reach 165°F (74°C).
4- Neglecting to let the oil return to temperature: Allowing the oil to return to the proper temperature between batches is essential for achieving a crispy coating.
Nutritional Facts (Per Serving)
- Calories: 480
- Total Fat: 22g
- Saturated Fat: 4g
- Cholesterol: 160mg
- Sodium: 980mg
- Total Carbohydrates: 38g
- Dietary Fiber: 2g
- Protein: 30g
Conclusion
Mastering the art of making Hawaiian chicken katsu at home is a rewarding endeavor that transports your taste buds to the sun-drenched islands of Hawaii. With its crispy exterior, tender interior, and tangy katsu sauce, this dish is sure to become a family favorite. By following the step-by-step instructions, incorporating the tips and tricks, and experimenting with variations, you’ll be able to create an authentic Hawaiian plate lunch that rivals the best local eateries. So, fire up your stove, gather your ingredients, and get ready to indulge in the ultimate comfort food experience – Hawaiian chicken katsu!
FAQs
Can I use chicken breasts instead of thighs?
While chicken thighs are traditionally used for their juiciness and flavor, you can substitute boneless, skinless chicken breasts if you prefer a leaner option.
Can I make the katsu sauce in advance?
Absolutely! The katsu sauce can be made a few days in advance and stored in an airtight container in the refrigerator. Simply reheat it gently before serving.
Can I bake or air-fry the chicken katsu instead of frying?
Yes, you can bake or air-fry the breaded chicken katsu for a healthier alternative. Bake at 400°F (200°C) until golden brown and crispy, or follow your air fryer’s instructions for best results.
Can I use regular breadcrumbs instead of panko?
While panko breadcrumbs are preferred for their light, crispy texture, you can use regular breadcrumbs in a pinch. However, the coating may not be as crispy and may become soggy more quickly.
How do I reheat leftover chicken katsu?
To reheat leftover chicken katsu, preheat your oven to 400°F (200°C). Place the katsu pieces on a baking sheet and bake for 10-15 minutes, or until heated through and crispy. Alternatively, you can reheat them in an air fryer or toaster oven for a crispier result.