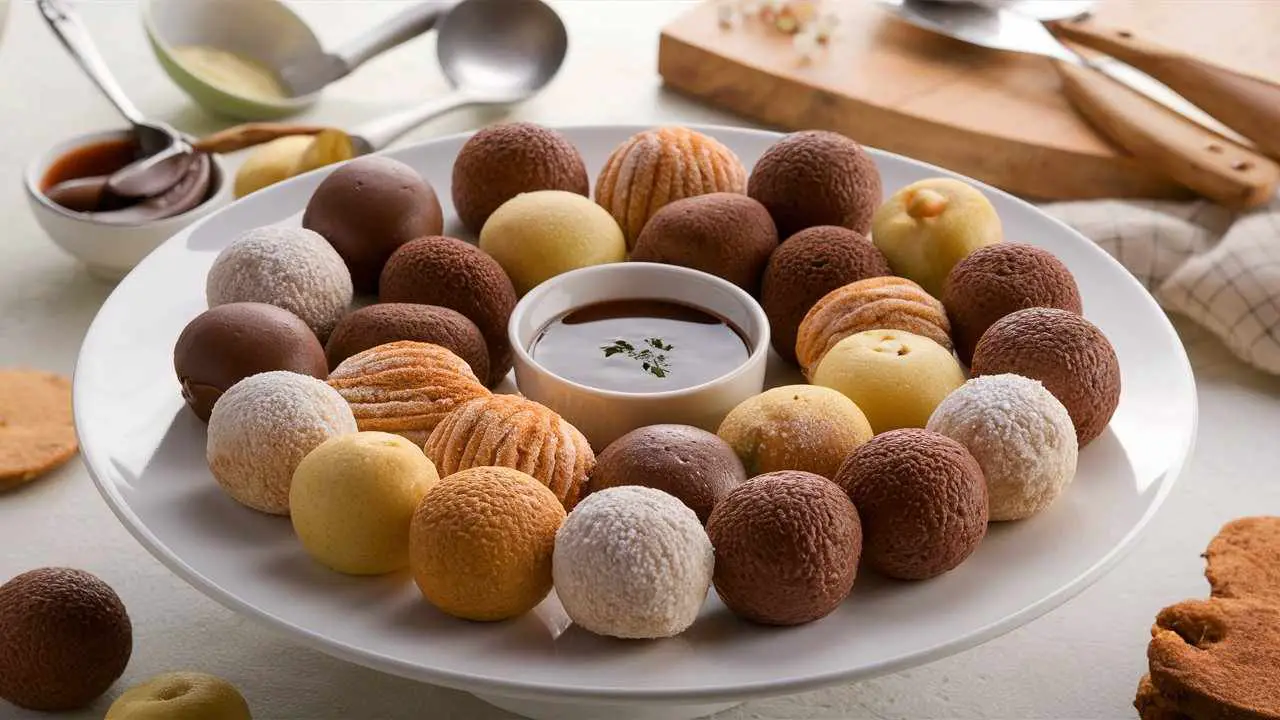
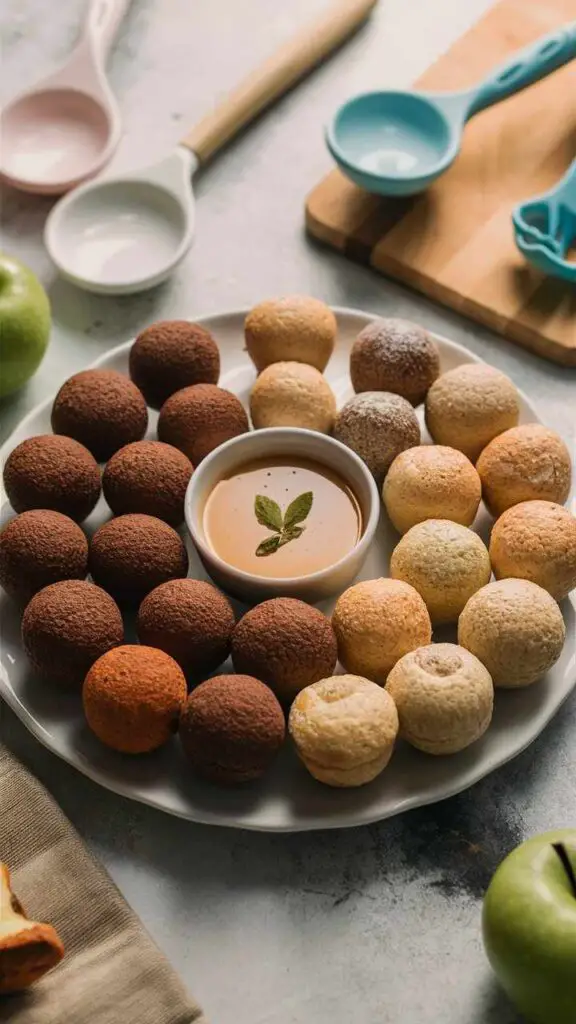
If you’re a fan of the iconic Canadian delicacy, timbits, you’re in for a treat! These bite-sized dough balls, also known as donut holes, are a beloved snack that can be easily recreated in your own kitchen. Imagine the satisfaction of biting into a warm, freshly fried timbit, coated in a delicate glaze or rolled in cinnamon sugar. With this comprehensive guide, you’ll learn how to craft homemade timbits that rival the ones from your favorite coffee shop, all while tailoring them to your unique taste preferences.
What are Timbits?
Homemade timbits are miniature doughnuts, typically spherical in shape, that are fried to golden perfection and often coated with a sweet glaze or dusting of sugar. These delightful morsels originated in Canada, where they were first introduced by the iconic Tim Hortons coffee chain in 1976. Since then, they have become a beloved treat enjoyed by Canadians and people worldwide.
Ingredients (Yields 30 timbits)
To embark on your homemade timbit journey, you’ll need the following ingredients:
- 4 cups (500g) all-purpose flour, sifted
- 4 tablespoons (50g) granulated sugar
- 2 tablespoons (30g) baking powder
- 1 teaspoon (5g) baking soda
- 1 teaspoon (5g) salt
- 1/2 teaspoon (2.5g) freshly grated nutmeg
- 2 large eggs, beaten
- 1 1/4 cups (300ml) whole milk, lukewarm
- 1 teaspoon (5ml) vanilla extract
- 6 tablespoons (85g) unsalted butter, melted and slightly cooled
- Vegetable oil for frying
- 1 cup (200g) granulated sugar or confectioners’ sugar for coating
Timing
- Preparation Time: 30 minutes
- Cooking Time: 20-25 minutes
- Total Time: Approximately 1 hour
Step-by-Step Guide to Preparing Homemade Timbits
Step 1- Combine the Dry Ingredients: In a large mixing bowl, whisk together the flour, granulated sugar, baking powder, baking soda, salt, and nutmeg until well combined.
Step 2- Prepare the Wet Ingredients: In a separate bowl, whisk together the beaten eggs, lukewarm milk, and vanilla extract until thoroughly combined.
Step 3- Create the Dough: Gradually pour the wet ingredients into the dry ingredients, stirring gently with a wooden spoon or rubber spatula until a sticky dough forms. Be careful not to overmix.
Step 4- Incorporate the Butter: Fold in the melted and slightly cooled butter until it is fully incorporated into the dough.
Step 5- Chill the Dough: Cover the dough with plastic wrap or a damp towel and refrigerate for 30 minutes. This step helps the dough firm up, making it easier to handle and shape.
Step 6- Portion the Dough: Using a small cookie scoop or two spoons, portion the chilled dough into tablespoon-sized balls. Arrange them on a parchment-lined baking sheet or plate.
Step 7- Fry the Timbits: In a deep, heavy-bottomed pot or Dutch oven, heat 2-3 inches of vegetable oil to 350°F (175°C). Carefully drop the dough balls into the hot oil, working in batches to avoid overcrowding. Fry for 1-2 minutes per side, or until golden brown.
Step 8- Drain and Coat: Using a slotted spoon or spider strainer, remove the fried timbits from the oil and transfer them to a paper towel-lined plate to drain excess oil. While still warm, roll or toss the timbits in granulated or confectioners’ sugar, or your desired coating.
Step 9- Serve and Enjoy: Allow the timbits to cool slightly, and serve them warm, accompanied by your favorite dipping sauce or a hot beverage for dunking.

Tips for Perfectly Shaped and Fluffy Homemade Timbits
-
Chill the Dough Thoroughly: Ensuring the dough is well-chilled before frying is crucial for maintaining the timbit’s shape during the cooking process.
-
Use a Cookie Scoop: Invest in a small cookie scoop or melon baller to portion the dough into uniform, evenly sized balls.
-
Maintain Consistent Oil Temperature: Monitor the oil temperature closely and adjust the heat as needed to keep it between 350°F (175°C) and 375°F (190°C). This ensures even cooking and prevents the timbits from absorbing excess oil.
-
Fry in Small Batches: Avoid overcrowding the pot when frying, as this can cause the oil temperature to drop and result in uneven cooking. Fry the timbits in small batches for best results.
-
Drain Properly: After frying, allow the timbits to drain on a paper towel-lined plate or wire rack to remove any excess oil, ensuring a crispy exterior.
Delicious Flavor Variations for Homemade Timbits
While classic cinnamon sugar or glazed timbits are always a delight, you can elevate your homemade creations by experimenting with various flavors and coatings. Here are some tantalizing ideas to inspire your culinary creativity:
1- Chocolate Glazed: Dip warm timbits in a rich chocolate ganache or melted chocolate for a decadent treat.
2- Maple Walnut: Roll timbits in a mixture of maple syrup and crushed walnuts for a touch of Canadian flair.
3- Lemon Zest: Infuse the dough with lemon zest and coat the timbits with a tangy lemon glaze for a refreshing twist.
4- Espresso Dusted: Combine cocoa powder and espresso powder for a coating that adds a delightful coffee flavor.
5- Pumpkin Spice: Incorporate pumpkin puree and warm spices like cinnamon, nutmeg, and ginger into the dough for a cozy autumn treat.
6- Coconut Lime: Roll warm timbits in a mixture of shredded coconut and lime zest for a tropical delight.
How to Glaze and Decorate Your Homemade Timbits
Glazing and decorating your homemade timbits is an excellent way to add visual appeal and enhance their flavor profile. Here are some techniques to try:
1- Dipping: Dip the warm timbits into your desired glaze, such as chocolate, vanilla, or maple, allowing the excess to drip off before placing them on a wire rack to set.
2- Drizzling: For a more rustic look, drizzle the glaze over the timbits using a spoon or piping bag.
3- Rolling: Roll the warm timbits in granulated sugar, confectioners’ sugar, or a mixture of sugar and spices like cinnamon or pumpkin spice.
4- Decorating: Get creative by sprinkling the glazed timbits with sprinkles, crushed nuts, or shredded coconut for added texture and visual appeal.
Baking vs. Frying: Methods for Making Homemade Timbits
While the traditional method of making timbits involves frying, you can also opt for a healthier baked version. Here’s a comparison of the two methods:
Frying:
- Yields a crispy exterior and fluffy interior
- Requires careful monitoring of oil temperature
- Timbits may absorb more oil, increasing the fat content
Baking:
- Eliminates the need for frying in oil
- Produces a slightly denser texture
- Lower in fat and calories compared to fried timbits
- Easier and less messy than frying
To bake homemade timbits, simply preheat your oven to 375°F (190°C), arrange the dough balls on a parchment-lined baking sheet, and bake for 10-12 minutes, or until golden brown. Then, proceed with glazing or coating as desired.
Common Mistakes to Avoid When Making Homemade Timbits
While making homemade timbits is relatively straightforward, there are a few common pitfalls to be aware of:
-
Overmixing the Dough: Overmixing can lead to tough, dense timbits. Mix the dough gently and only until the ingredients are just combined.
-
Improper Oil Temperature: If the oil is too hot, the timbits will burn before the inside is cooked through. If it’s too cool, they’ll absorb excess oil and become greasy.
-
Overcrowding the Pot: Frying too many timbits at once can cause the oil temperature to drop, resulting in uneven cooking and soggy timbits.
-
Inadequate Draining: Failing to drain the timbits properly after frying can lead to a greasy and soggy texture.
-
Improper Storage: Storing timbits improperly can cause them to become stale or soggy. Follow proper storage guidelines to maintain their freshness and texture.
How to Store and Keep Homemade Timbits Fresh
To enjoy your homemade timbits at their best, proper storage is essential. Follow these tips to keep them fresh and delicious:
-
Storing at Room Temperature: Place the cooled timbits in an airtight container or resealable plastic bag and store them at room temperature for up to 2 days.
-
Refrigerating: For longer storage, refrigerate the timbits in an airtight container for up to 5 days.
-
Freezing: To freeze homemade timbits, arrange them in a single layer on a baking sheet and freeze until solid. Then, transfer them to an airtight container or resealable plastic bag and store in the freezer for up to 3 months.
-
Reheating: To reheat frozen or refrigerated timbits, place them on a baking sheet and warm them in a preheated oven at 300°F (150°C) for 5-7 minutes, or until heated through.
Nutritional Facts (Per Timbit)
While indulging in homemade timbits is a treat, it’s essential to be mindful of their nutritional value. Here are the approximate nutritional facts for a single timbit:
- Calories: 100
- Total Fat: 5g
- Saturated Fat: 2g
- Trans Fat: 0g
- Cholesterol: 20mg
- Sodium: 120mg
- Total Carbohydrates: 13g
- Dietary Fiber: 0.5g
- Sugars: 6g
- Protein: 2g
Please note that these values may vary depending on the ingredients and cooking method used.
Conclusion
Homemade timbits are a delightful treat that can be easily crafted in your own kitchen, allowing you to indulge in the nostalgia of this beloved Canadian delicacy while tailoring it to your personal preferences. With this comprehensive guide, you now have the knowledge and tools to create perfectly shaped, fluffy, and flavorful timbits that will impress your family and friends. Whether you prefer the classic cinnamon sugar coating or want to experiment with unique flavor combinations, the possibilities are endless. So, roll up your sleeves, gather your ingredients, and let the timbit-making adventure begin!
FAQs
Can I use a different type of flour for making homemade timbits?
While all-purpose flour is recommended, you can experiment with other flours like whole wheat or gluten-free blends. Keep in mind that the texture and consistency may vary.
How can I make homemade timbits vegan or dairy-free?
To make vegan or dairy-free timbits, substitute the milk with plant-based alternatives like almond or coconut milk, and use vegan butter or coconut oil instead of regular butter.
Can I bake the timbits instead of frying them?
Yes, you can bake homemade timbits instead of frying them. The baked version will have a slightly denser texture but will be lower in fat and calories.
How long do homemade timbits stay fresh?
Homemade timbits will stay fresh for up to 2 days at room temperature, 5 days in the refrigerator, or up to 3 months in the freezer when stored properly.
Can I make homemade timbits ahead of time?
Yes, you can prepare the dough in advance and refrigerate it for up to 2 days before portioning and frying or baking the timbits.
By following this comprehensive guide, you’ll be able to create delectable homemade timbits that rival those from your favorite coffee shop, all while tailoring them to your unique taste preferences. Indulge in the nostalgia of this beloved Canadian treat and impress your family and friends with your culinary skills.